Nursery

One December 28th, 2013 my sweet baby girl was born. I have been working on her nursery for a while now but tend to get easily distracted.

I knew I wanted to create a room she could easily grow into but also wanted it to be fun and cheery. Then, one day, while searching online I fund a gorgeous abstract painting that inspired me. Her room is easily one of my favorites in our home.

I am hoping to finish up in the next couple weeks. For now, I will leave you with my mood board. Can't wait to show you the final product!


Turkey Meatloaf

Posted By: Kristi


A friend at work told me about this recipe, found here, it was really really good! I was very impressed! I cut this recipe in half and it was huge. Below are the ingredients for double what I made.

Ingredients

  • 3 cups chopped yellow onions (2 large onions)
  • 2 tablespoons good olive oil
  • 2 teaspoons kosher salt
  • 1 teaspoon freshly ground black pepper
  • 1 teaspoon fresh thyme leaves (1/2 teaspoon dried)
  • 1/3 cup Worcestershire sauce
  • 3/4 cup chicken stock
  • 1 1/2 teaspoons tomato paste
  • 5 pounds ground turkey breast
  • 1 1/2 cups plain dry bread crumbs
  • 3 extra-large eggs, beaten
  • 3/4 cup ketchup

Directions

Preheat oven to 325 degrees F.
In a medium saute pan, over medium-low heat, cook the onions, olive oil, salt, pepper, and thyme until translucent, but not browned, approximately 15 minutes. Add the Worcestershire sauce, chicken stock, and tomato paste and mix well. Allow to cool to room temperature.
Combine the ground turkey, bread crumbs, eggs, and onion mixture in a large bowl. Mix well and shape into a rectangular loaf on an ungreased sheet pan. Spread the ketchup evenly on top. Bake for 1 1/2 hours until the internal temperature is 160 degrees F. and the meatloaf is cooked through. (A pan of hot water in the oven under the meatloaf will keep the top from cracking.) Serve hot, at room temperature, or cold in a sandwich.


Let us know what you think! If you have another meatloaf recipe, please share. My husband loves meatloaf and I would love to try different kinds.


Tutorial - Turn Dollar Store Coasters into Custom Coasters

Posted By:  Stephanie


I hope this post finds all of you well!  I don't know where you are but here in the Oregon/Washington area Fall is in full effect with lots of rain and falling leaves.  I have to admit, I kind of love it.  I'm a fan of all the seasons that we are so lucky to experience here so I welcome the rainy season with open umbrella arms!  Now onto the tutorial I mentioned above.


I found these coasters that basically just had a paper on top from our local Dollar Tree.  I though, hmmm why not custom make these to fit my taste, it isn't anywhere close to Independence day so the stars and stripes just wont do.


As you can see they are cork on the back.


I found this piece of paper in my stash and decided it was perfect.  I would have coasters that would be different but all match.


Next I traced the coasters on the back.


Cut them out.


Put mod podge on the front of the coaster so the paper would stick.


Once then put another later on top to seal it.  I actually let it try and did this twice.


Please refer back to the first picture for the final product.  I was happy with how they turned out and I'm thinking I might even custom make some for maybe a specific person or party.  What do you think?


Recipe - Taco Soup

Posted By:  Stephanie


I love Taco Soup, or is it Chili?  I'm not really even sure what to call it, or what the definition on chili really is so lets just go with, I love this recipe!

1 large onion, chopped
1 can Pinto Beans
1 can Chili Beans
1 can Whole Kernel Corn
1 can Diced Tomatoes - any flavor, I prefer Italian Seasoned
1 can Mexican Style Tomatoes - I used Tex Mex Style Tomatoes
1 package Taco Seasoning
1 package Ranch Dressing Mix
1 lb meat of your choice - I threw in 3 frozen boneless skinless chicken breasts

Put in the crock pot (do not drain cans) for about 7-8 hours on low heat.  If you use chicken breasts like I did, pull them out when the food is cooked and put them in a bowl.  Using forks shred the chicken which will be very easy to do.  Put it back into the crock pot and mix the meat in.

When serving this it is really good with cheese, sour cream and tortilla chips!  YUMMY!

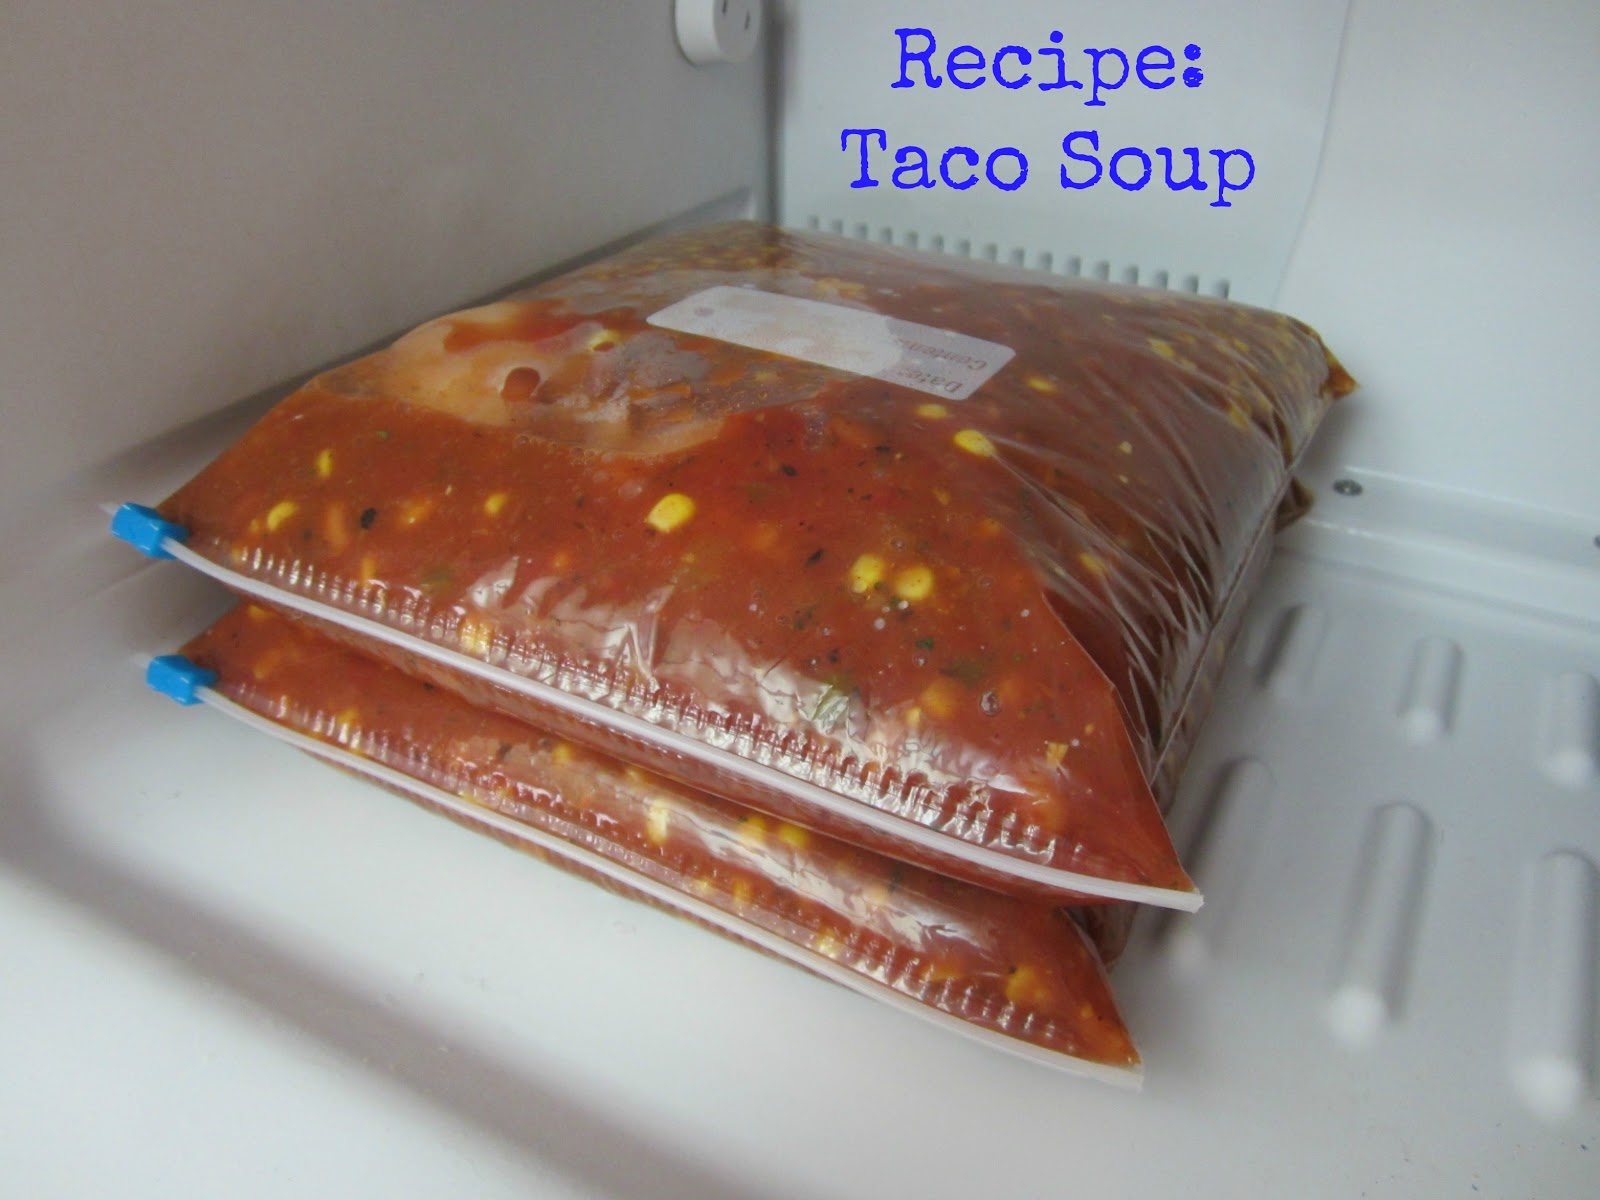
Although this recipe is extremely quick and easy I like to make it even easier by putting all the ingredients in a large zip lock bag and freezing it.  That way I can put the bag in the refrigerator the day before so that I'm able to break it up in the morning and get it into the crock pot and not have to mess with the cans, chopping and all that good stuff.  Most likely it will still be mostly frozen if you took it out of the freezer the evening before.  Just a little tip so that you don't end up with a big mess, use a pitcher to put the bag in before adding your ingredients, that way you wont have a spill accident which is easy to do with all the liquids.


Cake Mix and Pudding Cookies

Posted By:  Stephanie


These cookies are so good and soft!  I know some people love a crunchy cookie but I am all for a nice and soft one.  I've never had a recipe that gave me that perfect fluffy cookie until now.  A friend made these, told me how to make them and I couldn't wait to try it out myself.


All you have to do is follow the instructions on any cake mix, minus one egg that it calls for and add one pudding.  It's that easy!  Oh and of course they wouldn't be the same without being topped with frosting!  The only trick to making these fluffy and not into flat pancakes (I did that once) is to make sure that your eggs are at room temperature.  The pudding should already be at room temperature because it is not the pudding that comes in the refrigeration section at the store, you will find it near the cake mix in the warm aisle.  I'm sure there is a better term for that but I'm not sure what it is.  = )  

Now that the weekend is here you should run to the store and give it a try.  As with any baking adventure in our house Little Lou got involved and loved it.  She likes when we use the hand mixer and before we turn it on she gets excited and yells, "I want to make noise!"  I sure do love that girl!


Have you made cookies from cake mix?  If your recipe is different please share.


Quick Fix

Posted By: Kristi


Am I the only one who gets tired of their kitchen towels slipping off of the oven handle onto the floor? I am a laid back person but I admit, this drives me CRAZY. I came up with a quick fix and so far, it is working beautifully!

I chose a few of my favorite kitchen towels and only upgraded them for now. I wanted to make sure this was a fix I was going to like before going DIY nutty.

1. You will need a kitchen towel and velcro. I purchased the velcro (Fabric Fusion) below. I found it at Michaels, unfortunately I can't remember how much I paid for it.


2. You will iron on the velcro on opposite sides of the towel so that when you are done, you can velcro it together and it will be tubular.


3. That's it! Place it on your oven and enjoy the fact that it will be where you left it!


Tutorial: Kids Play Makeup

Posted By:  Stephanie


Lately my little girl who's 2 loves to play with makeup.  It doesn't matter to her if it is real or fake, to her it is all VERY real = )

I decided that I would get a head start on Christmas gifts and make her a set of eye shadows and blush to go in a "makeup" kit for her.


I got these from the Dollar Store, that way I wasn't wasting good makeup.  I don't wear enough myself to have a lot of spare containers laying around, if you do use those.


Pick some nail polish colors you feel would work well for your "makeup".


I found using a toothpick and running it around the outer edge of the makeup made it either pop right out or break up really well so it came out pretty clean.


I then used a q-tip to clean out the corners to make them really look nice and real makeup free.


Next add the nail polish.  I did just enough so that the bottom was covered and you don't see metal, then paint the outer brim of the metal to give it the effect that it is completely full.


There you have it, mess free makeup for your little one or as a gift for a little girl you know would love it.  All you have to do is wait for it to dry.  Warning, this is a bit of a stinky process!


Related Posts Plugin for WordPress, Blogger...