Playroom Art

Posted By: Kristi


Hi!! Thanks to the four day weekend I just had, I am feeling refreshed! I hope you all had a nice refreshing weekend as well!

Yesterday, Stephanie showed you all the mug that my sweet Little Lou made me, isn't it precious? I of course teared up the moment I saw it!

Now that our Birthdays are over we are working on more projects. I recently moved my craft room so we have decided to make my old craft room a playroom for our nieces and nephews. We have started collecting toys for them to play with when they visit and have already noticed that having the toys all over the house is chaotic. A room to organize them in will be much better.

Today, while I was at Target browsing the dollar section, I found these flash cards.


I decided that framing them could make great art for the new playroom. I already had a frame at home so this entire project only cost me $1.00!


I have had this in the closet for three years now so I knew that I wouldn't care about using it in the future. I turned the picture over and glued the flash cards directly to the back.

Note: Make sure to lay all the cards out the way you want them first, before gluing them down. That way, you don't have to peel them off and make a mess.


This will really brighten up the room. I will hang it once I figure out what furniture will be in there.


This might end up being my favorite room to decorate. = )


Bedroom Makeover

Posted By: Kristi

Why is it that our bedroom is always the last room that we decorate and beautify? This is the room that we get romantic in, but for many of us, when we look around our bedroom we notice that there isn't much romantic about it. I have decided it is time for a bedroom makeover. We moved into our house over a year ago and have barely done a thing to it. It will take time to complete but at least I have my inspiration pictures (sorry, I don't have the sources for the pictures).

The color scheme will be mainly black and white with a touch of yellow.

All white bedding.

Black and white striped curtains or I will make black and white striped roman shades.

I will make a burlap headboard.

Paint our dresser yellow.

Add striped throw pillows on the bed.

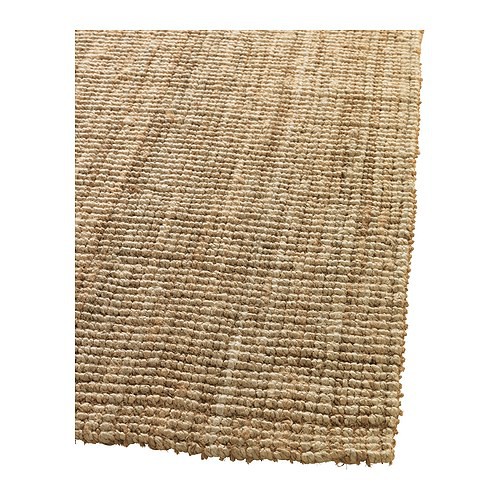
Jute area rug to add texture and to tie in the headboard.

Carson just gave me his nod of approval, thank goodness he lets me run with my ideas!

What do you think??


Toddler Tuesday - A Mug Gift from a Toddler

Posted By:  Stephanie

Good morning and welcome to Toddler Tuesday.  I hope everyone enjoyed their weekend, and I really hope that those of you who work or have a spouse that does got the enjoy a long weekend!

In my last post yesterday found here you will see all the info and links to other posts about Bubba (Kristi) and I and our birthdays.  If you've been following along you're probably ready for the birthday posts to be over but good news is, they almost are AND you wont have to hear about our birthdays for an entire year!

Will and I gave Bubba her birthday present on her actual birthday but because we all got together yesterday My Girl gave her gift to Auntie Bubba then along with the rest of the family.

This is a great gift idea for your toddler, or young child to give as a gift.  We got the permanent markers and the mug from the Dollar Store for a total of $2.00 and the gift is worth so much more than that to Auntie Bubba and My Girl loved making it.  In fact, she got upset when I wouldn't let her continue drawing on her highchair tray, and we both got marked up because of this gift but it was SO worth the look on my sisters face.  I wrote a message to her from My Girl on the mug, and drew a few balloons then let her have at it.  She drew lots of great squiggles and the project was complete, made with love.


While she was working on this project I took a picture of this bracelet I made for Will.  We decided to go back in time and make hemp bracelets, it had been a long time and was pretty fun.  Now that I'm older it went together A LOT faster then it did when my hands were much smaller.


I can't find the site we used that had great pictures on how to make it, but there is another site here that looks like it might give some good instructions.  That site also talks about making them with beads, have fun going back in time like we did!

Birthday and Milk Jug Repurpose

Posted By:  Stephanie

Hey there!  If you've been following along then you know that yesterday was my 25th birthday!  My sweet sister posted about it yesterday here.  I was so surprised and loved what she wrote, thank you!  Bubba (Kristi) and I are 2 years and 3 days apart so her birthday was on Thursday, September 1st.  If you missed the posts about her birthday you can read about it here and here.

I had a great birthday because I have such an amazing family that works so hard at making sure that my day is special every year.  Will put balloons in my bedroom just like he does every year for me.  My mom used to decorate the family room for Bubba's birthday, take it down and completely re-decorate for my birthday as well as put balloons on our bedroom floor for us to wake up to every year.  One year we were in Seattle and I still woke up to the balloons, we have the BEST mom!  Will has taken over that tradition for my mom and as our girl gets older and we have other kids we will do the same thing for them.  My husband is the greatest!


This is what my birthday looked like:

Flowers, balloons, gifts (many not shown below), yummy cheesecake for my sister and I (we celebrated with the family together yesterday), great brunch provided by our mom, and evening at the river and just a great time with family.  My dad got me a new camera, because like I mentioned here my camera was left at Target and I now have a new one!  Thank you SOOOO much dad, you are so awesome!  In the meantime my amazing mother-in-law Cathy has been letting me use her camera, I really appreciate that, it has been a lifesaver.  I'm feeling very grateful for so many things, I could go on and on and on.


Here is a great tip that my mom came up with yesterday.  My girl has a tendency to pull place mats right off the table so she used a Silpat because it doesn't slide easily.  BRILLIANT!  The mat stayed on the table the entire time.  Thanks for the tip mom!


In the post found here I talked about how much I don't like that we don't have recycling where we live and that I was trying to come up with ways to use things that I have been throwing away.  I have now found a way to use an old milk jug.


First I washed out the milk jug.


Then cut the the jug in half right under where the handle is.


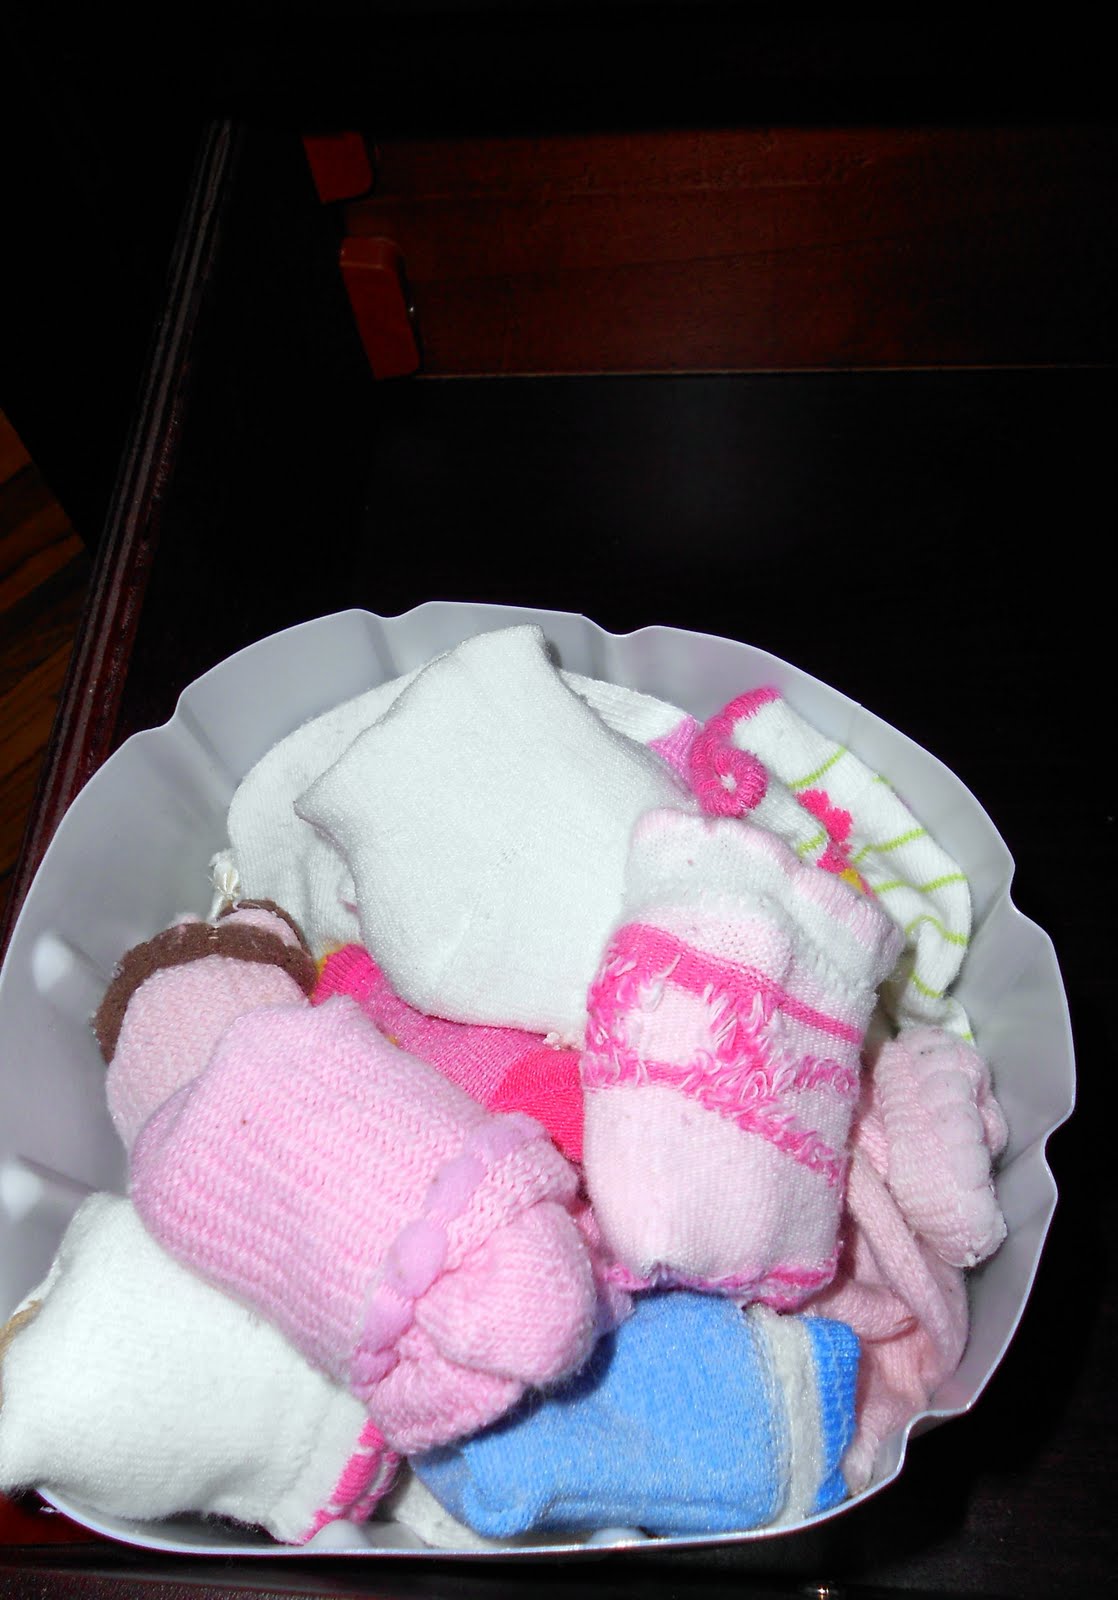
I like to keep My Girl's socks in a container in her drawer so that they don't get mixed in with her clothes.  The socks share a drawer with other things so I like to keep them organized.  I am staying home with her now and that means being even more frugal now then we were before.  I wanted to use this container for something else that would be seen so I needed a replacement.


YAHOO!  I have a new sock holder!  Best part about it is that the container is taller so it holds all the same socks that were in the other container above and now there is even more drawer space for other things.


This is what I got out of it.  Good trade, good trade!


What do you use old milk jugs for?

*Update*  I finally have a picture of our sister Samantha wearing the zipper headband that I made here (when you go the the link, scroll to the bottom to see the picture), although the headband is cute, she is MUCH cuter!  ; )


HAPPY BIRTHDAY, STEPH!

Posted By: Kristi


Today is Steph's 25th Birthday! For those of you who don't already know, Steph is the wind beneath my wings.


Last night we went to a wedding together and were able to enjoy some girl time!

Car windows down + loud music = DANCE PARTY!

I love this girl more than peanut butter and ice cream!

HAPPY BIRTHDAY, STEPH!!!!
XOXO
 

Side note: Isn't Oregon BEAUTIFUL?


Crayon Print T-Shirt

Posted By:  Stephanie

Hello!  Today is a great day, the first day of a 3 day weekend for Will.  I love when he gets an additional day off, that way once Sunday night comes we are gitty that we get to hang out late one more night.  Sadly, late for us is like 10:30-11:00pm, that is what used to be 1-2am when we were younger.

Today I went to the Dollar Store, with a craft emergency!  I am working on another project but the paint is taking WAY to long to dry so I wanted/needed to make another project.  It was also a good excuse to get out of the house and sneak to an estate sale on the way.

Here we go, a tutorial on how to make a T-Shirt print using CRAYONS!  This is such an easy project and it only cost $2.  I got the T-Shirt and the sandpaper from the Dollar Store and I already had the crayons on hand.

Step One

Gather supplies.  I used stencils because I'm in no way a freehand kind of girl.  I love to craft but my drawing is not to be seen.

Supplies:

Crayons
T-Shirt
Sandpaper - preferably fine
Stencils if you would like
Iron
Dryer


Step Two

Start drawing your picture on sandpaper.  I decided to use a dog and cat because My Girl LOVES dogs and cats right now.  When you are coloring, make sure to go over your design several times, you want the crayon to be on there nice and thick.  This is something that your kids would love to do, just remind them that whatever they draw, it will be on the T-Shirt backwards.


Step Three

Once you are finished you may see that there are a few spots that have crayon marks that you don't want to show up on your T-Shirt.  I used a piece of the sandpaper from the corner and sanded those spots.  Seemed to work pretty well for me.


Step Four

Put cardboard inside the T-Shirt to prevent the crayon from leaking through.


Step Five

Iron the design onto the T-Shirt.  Put something like a thin towel or paper towel between the sandpaper and the iron to protect your iron.  Iron on cotton setting for about 30-45 seconds.


Step Six

Check to make sure your design is transferring onto the T-Shirt well, if not continue ironing for another 15-20 seconds.  If it is on there well, take the sandpaper off and put a paper towel or thin towel on the image and iron on top of it for about 20 seconds to set it.


Step Seven

Put the T-Shirt in the dryer for about 20-30 minutes to finish setting it.  When you wash it for the first time make sure you wash it all alone because the crayon may bleed some.


My Girl in her new fancy doggy and kitty shirt.  She is such a goof!


I will be using this shirt most likely for when we do crafts, that way I wont have to worry about her clothes getting stained.  We did another project today where she was using some permanent makers...I know probably not my best parental choice, but hey, the project needed permanent markers what was I supposed to do?  = )  Anyway, this T-Shirt will be used for things like that, her clothes were spared this time but the tray of her highchair was not.

This would be a great project for older kids at a birthday party.  Please make sure you either assist them or do the ironing yourself, burnt fingers are not cool!  All the kids could make their design, iron them and then while you continue the party you can dry to set them.  I don't know how multiple shirts would do in the dryer at the same time but you could also send the T-Shirt home and let the parents know that they will need to dry it there. 


WHAT WE'RE UP TO AROUND HERE

WARNING:  Images below may hurt your eyes!

These are pictures of what will be our girl's big girl room.  When we moved in we put a ton of stuff that we didn't want to deal with at the time into this room, and we have continued to throw things in it since.  I will even confess, this room was even worse, this is after Will had been working on clearing it out for awhile.


I'm not sure why these pictures turned out so bad, I think it's because of the bad lighting.  Here is trooper Will, he takes a long time to clear out each box because a lot of them have pictures from his childhood.


I'll be back with more on that room, you will get to watch the room transform, I have a lot of projects in mind for it.  For now, I need to get ready to go, I'm going with Bubba to a wedding.  SISTER DATE!


Wall Art - Birthday - Disney

Posted By: Kristi


Yesterday was a great day. Thanks to those close to me, I had a very happy Birthday. Wasn't Steph's poem the sweetest? The love and friendship between sisters is the best. One of a kind.

Carson spoiled me rotten yesterday. He gave me great gifts, took me to dinner and made me feel special the entire day. Not only did he make me feel special yesterday but today he came home with these.


Aren't they beautiful? He is a special man.

I explained before that I like to add decor in our home that represents us. I am currently working on a gallery wall and recently made this to add to it.


Sorry about the picture.

Reflection from the glass + camera phone = horrible pictures. 

Here is a closer (still low quality) picture.


The hearts are located in three different spots on the map. One on Oregon, we live in Oregon and this is where we started dating. On the far right the heart is placed on Washington D.C., this is where Carson proposed. The last heart is placed on Belize. We are getting married on the beach in Belize next April. I am thinking about stitching a line to each place but haven't decided for sure yet. It makes me smile every time I walk by it.

Finally, Disneyland details!


Disneyland was an amazing time, I enjoyed spending quality time with my Dad and Sister. It seems like lately I have been travelling to the east coast so it was nice travelling to somewhere closer by, the flight was a breeze!

The minute we landed we were on the go. We dropped off our luggage at the hotel and got a bite to eat. Afterwards, we headed to Disneyland. The weather was a record high and the park was crowded. It was nice though, everyone was excited and in a happy mood so the crowds weren't a bother. We were able to hit most of our favorite rides in Disneyland and by the end of the day we were pooped! We headed back to the hotel to rest and had intended to go back to Disneyland later for some more fun. Instead, we enjoyed a movie in our room and a nice dinner. Us Oregonians weren't used to the extreme heat and we had already spent about six hours at the park so relaxing felt goooood!

The second day we woke up with renewed energy. We visited California Adventures and enjoyed another day in the sun! That evening we went back to the hotel to rest and then went to Disneyland that night. I had forgotten how amazing Disneyland is at night, my favorite! It is so magical all lit up. We found a spot to sit to watch the fireworks. Enjoying the fireworks show in Disneyland is a must, it's like a dream. I have a great video of it but it is too long so I need to edit it before I can post it.

The last day we went back to Disneyland to catch a couple rides we had yet gotten a chance to enjoy. I am really happy we had three days, there is so much to do!

My Dad spoiled us, were/are two lucky girls. It was nice feeling like a kid again, travelling with my Daddy. I also really enjoyed Samantha's company. She is so grownup and incredibly beautiful. She is extremely witty and entertaining.


I knew I would have fun but I did not realize how important this trip would be to me. I made so many memories in three days that I will always carry with me. I am so grateful.


Related Posts Plugin for WordPress, Blogger...